Skip to content

Blog

Enhance Resource Security with Pritunl VPN Server

Enhance Resource Security with Pritunl VPN Server

Ensuring secure remote access is essential for data privacy and efficient collaboration across dispersed teams. One of the most reliable solutions for securing such communication is Pritunl VPN Server—an open-source, scalable, and highly secure VPN solution that allows users to safely access internal networks from anywhere.

In this guide, you’ll learn how to install and configure Pritunl VPN Server for corporate use, making sure your team enjoys safe, encrypted communication wherever they are.

Pritunl features

Pritunl Topology

Pritunl is an open-source, enterprise-level VPN server that provides a highly secure and scalable way to manage virtual private network (VPN) connections for businesses and organizations.

  1. Open-Source and Free
  2. Highly Scalable
  3. Web-Based Management Interface
  4. Multi-Cloud and Cross-Platform Support
  5. Two-Factor Authentication (2FA)
  6. And many more, Source: pritunl.com

Pritunl is a powerful and flexible VPN solution that combines ease of use, scalability, and enterprise-grade security features.

Prerequisites

Before you start, ensure you have the following:

  1. A server running a fresh installation of Ubuntu 22.04 or higher.
  2. 16 GB SSD, 1 vCPU 1 Gb RAM, for small deployment ~ 50 user.
  3. Root or sudo access to the server.
  4. A public IP address for the VPN server.
  5. Domain name (optional but recommended for easier access).
  6. SSH access to the server.

Step 1: Add Pritunl Repository (Ubuntu 22.04)

Open your server terminal, copy and paste command below

sudo tee /etc/apt/sources.list.d/mongodb-org.list << EOF
deb [ signed-by=/usr/share/keyrings/mongodb-server-7.0.gpg ] https://repo.mongodb.org/apt/ubuntu jammy/mongodb-org/7.0 multiverse
EOF

sudo tee /etc/apt/sources.list.d/openvpn.list << EOF
deb [ signed-by=/usr/share/keyrings/openvpn-repo.gpg ] https://build.openvpn.net/debian/openvpn/stable jammy main
EOF

sudo tee /etc/apt/sources.list.d/pritunl.list << EOF
deb [ signed-by=/usr/share/keyrings/pritunl.gpg ] https://repo.pritunl.com/stable/apt jammy main
EOF

sudo apt --assume-yes install gnupg

curl -fsSL https://www.mongodb.org/static/pgp/server-7.0.asc | sudo gpg -o /usr/share/keyrings/mongodb-server-7.0.gpg --dearmor --yes
curl -fsSL https://swupdate.openvpn.net/repos/repo-public.gpg | sudo gpg -o /usr/share/keyrings/openvpn-repo.gpg --dearmor --yes
curl -fsSL https://raw.githubusercontent.com/pritunl/pgp/master/pritunl_repo_pub.asc | sudo gpg -o /usr/share/keyrings/pritunl.gpg --dearmor --yes
sudo apt update

Step 2: Install pritunl VPN Server

Open your server terminal, copy and paste command below

sudo apt --assume-yes install pritunl openvpn mongodb-org wireguard wireguard-tools

sudo ufw disable

sudo systemctl start pritunl mongod
sudo systemctl enable pritunl mongod

Tip

Please add repository based on your current operating system here https://docs.pritunl.com/docs/repo

Step 3: Pointing IP Public pritunl VPN Server to your DNS Record

This is optional but highly recommended for secure and easier VPN Server Management, I believe you can configure DNS Record, but if you don't know how to do it please check this tutorial namecheap.com: How to set up DNS records for your domain in a Cloudflare account

Step 4: Enable SSL in Web Access

Pritunl SSL

After pointing DNS Record to your VPN Server, I recommend to config SSL Cert using Let's Encrypt

  1. Login to your pritunl admin.
  2. Click Settings.
  3. Enter Public Address using Hostname / Server Public IP.
  4. Enter Lets Encrypt Domain.

Tip

How to renew pritunl Let's Encrypt certificate

sudo pritunl renew-ssl-cert

#For other pritunl command
sudo pritunl --help

Step 5: Config pritunl VPN Server

Pritunl Server

  1. Login to your pritunl admin.
  2. Click Servers > Add Server.
  3. Click Advanced for more details.
  4. Enable DNS Routing (Recommended).
  5. Choose UDP and Port Number.
  6. Customize other config.
  7. Click Add.
  8. Start Server.

Info

⚠️ Don't forget to open the chosen UDP/TCP port in your firewall, or users won’t be able to connect! 😹

Step 6: Add User and Organization

Pritunl User

To add users and manage access:

  1. Log in to the Pritunl admin panel.
  2. Go to Users > Add Organization.
  3. Add a new user and assign them to the organization.

Step 7: Download VPN Client and Import Profiles

Pritunl Client

Finally you can start connect to your VPN Server and use secure connection for accessing your resource. To connect to your VPN server:

  1. Log in to the Pritunl admin panel.
  2. Navigate to Users > Select the user > Download Profile.
  3. Extract the .tar file.
  4. Import the profile into your VPN client app.
  5. Enter the username and password (User PIN).
  6. Connect to the VPN server.
  7. Verify your connection by checking your public IP WhatIsMyIP

Tip

You can use the OpenVPN Connect client Apps, or download the official Pritunl Client

Conclusion

By following this guide, you have successfully installed and configured the Pritunl VPN Server for corporate use. With its flexibility, Pritunl allows for easy scaling, making it perfect for businesses prioritizing secure remote access. Its built-in SSL configuration and user management features offer robust protection for sensitive data.

Explore more of Pritunl’s advanced features, such as Multi-Factor Authentication (MFA), advanced firewall rules, or split tunneling for optimized traffic.for further customizations such as multi-factor authentication (MFA), advanced firewall rules, or split tunneling for optimized network traffic.

Reference

How to Reduce Docker Image Size and Ensure Security in Your Docker Images

How to Reduce Docker Image Size and Ensure Security in Your Docker Images

Docker has revolutionized the way we deploy applications, but managing large images can be a challenge. Not only do larger images consume more storage space and bandwidth, they also pose potential security risks if not managed properly. In this blog post, we'll explore strategies to reduce Docker image size while ensuring the security of your images.

Why we need to reduce docker images?

Reducing the size of Docker images is crucial for several reasons:

  1. Storage Efficiency: Larger images consume more disk space, which can quickly lead to limited storage on systems where containers are deployed. Smaller images require less storage, allowing you to manage multiple applications and their environments more efficiently.

  2. Performance Optimization: A smaller image size means faster download times when deploying new containers or pushing them to registries. Faster deployment speeds improve productivity and can speed up the delivery of updates.

  3. Bandwidth Savings: When images are larger, transferring them over networks (such as from a registry to a Docker host) consumes more bandwidth. Reducing image size means less time spent downloading and more time running applications.

  4. Security: Larger images can potentially contain unnecessary files or libraries that increase the attack surface of your containers. Smaller images are easier to audit, reducing the risk of vulnerabilities being exploited.

  5. Scalability: In environments with limited resources (like edge devices or cloud instances), smaller images help optimize resource usage, allowing for more applications to be deployed on a single host.

1. Use Multi-Stage Builds

Multi-stage builds are a powerful feature in Docker that allows you to optimize the final image size by leveraging intermediate containers for different stages of the build process. This technique is particularly useful for compiling code on one container and then copying only the necessary binaries to the final image.

Here's an example:

# Stage 1: Compile application
FROM golang:alpine AS builder
WORKDIR /app
COPY . .
RUN go build -o myapp main.go

# Stage 2: Create minimal runtime environment
FROM alpine:latest
WORKDIR /root/
COPY --from=builder /app/myapp .
CMD ["./myapp"]

In this example, the golang image is used to compile the application (Stage 1), and then only the compiled binary is copied into a minimal alpine:latest image for the final runtime environment (Stage 2). This results in a significantly smaller final image.

2. Minimize Image Layers

Each instruction in your Dockerfile creates a new layer. Keeping these layers to a minimum helps reduce the size of the final image. Here are some tips to minimize layers:

  • Combine RUN commands: Combine multiple RUN commands into one whenever possible. This reduces the number of layers and speeds up the build process.
# Bad practice
RUN apt-get update && apt-get install -y \
  package1 \
  package2

# Good practice
RUN apt-get update && apt-get install -y package1 package2
  • Remove unnecessary files and caches: After installing packages, remove any temporary or unnecessary files to reduce the size of the final image.
RUN apt-get update && apt-get install -y \
  package1 \
  package2
RUN rm -rf /var/lib/apt/lists/*

3. Use Smaller Base Images

Choosing the right base image can have a significant impact on your Docker image size. Official images from reputable sources are usually well-maintained and secure, but they may also be larger in size. Look for minimal or slim variants of popular base images like Alpine, Ubuntu, or Debian.

# Instead of using the full Ubuntu image
FROM ubuntu:latest

# Use a smaller variant
FROM ubuntu:slim

4. Optimize Dependencies and Libraries

Ensure that your application dependencies are optimized for size. For example, if you're using Python libraries, consider using pip install --no-cache-dir to avoid including unnecessary cache files in the image.

# Example Dockerfile snippet for optimizing Python dependencies
FROM python:3.9-slim
WORKDIR /app
COPY requirements.txt .
RUN pip install --no-cache-dir -r requirements.txt
COPY . .
CMD ["python", "app.py"]

5. Leverage Multi-Architecture Images

Docker supports multi-architecture images, which allows you to build and run containers on different platforms (e.g., AMD64, ARM64). This can help reduce the size of your images by targeting specific architectures.

# Build an image for a specific architecture
docker buildx create --use
docker buildx build --platform linux/amd64 -t myapp:latest .

6. Regularly Prune Docker Resources

Regularly prune unused Docker objects to free up server disk space and maintain optimal performance. You can use the following commands to clean up unnecessary data:

Docker system prune: Remove all stopped containers, unused networks, dangling images, and build cache.

docker system prune -a

Tip

I recommend do this command only on staging / development server, if you want to run in production please do manually volume remove by

docker image ls
docker image volume rm <volume_id>

7. Secure Your Docker Images

Last thing is ensuring the security of your Docker images is crucial. Here are some best practices:

  • Use trusted base images: Always start with a secure and reputable base image, such as those provided by official vendors like Alpine, Ubuntu, or Debian.

  • Minimize exposure to vulnerabilities: Regularly update your base images, application dependencies, and Docker itself. Use tools like Trivy for scanning your images for vulnerabilities.

docker run --rm -v /var/run/docker.sock:/var/run/docker.sock aquasec/trivy:latest image --severity CRITICAL,HIGH <image_name>
Example output:

Trivy Docker Image Scan

Tip

Instead using latest docker image you can specify docker image version when create dockerfile to ensure image stability and security, for example:

FROM python:latest FROM python:3.9.20-alpine3.20 

Conclusion

Reducing Docker image size not only helps with storage and performance but also enhances security by minimizing the attack surface. By using multi-stage builds, minimizing layers, selecting smaller base images, optimizing dependencies, leveraging multi-architecture images, regularly pruning resources, and securing your images, you can create more efficient and secure Docker deployments.

Remember to continually evaluate and optimize your Dockerfile practices to ensure that your application remains performant and secure.

Reference

How To Running ChatGPT Locally Using Docker OpenWebUI

openwebui banner

Running ChatGPT Locally Using Docker OpenWebUI

In the evolving world of artificial intelligence, having the ability to run models locally can provide you with greater control, privacy, and customization. This guide will walk you through setting up ChatGPT locally using Docker and OpenWebUI, in this demo we utilizing the Phi3.5 model also you can find other model in here Ollama Model Library I will also cover an optional setup for leveraging NVIDIA GPUs in WSL 2 on Ubuntu. Let’s dive in!

Prerequisites

Before you begin, ensure you have the following installed on your machine:

  1. Docker: Make sure Docker is installed and running. You can download it from the official Docker website.

  2. Docker Compose: While Docker usually comes with Docker Compose, verify it’s available by running docker-compose --version in your terminal.

  3. Git: You will need Git to clone the repository.

  4. NVIDIA GPU (optional): If you plan to use GPU acceleration, ensure you have a compatible NVIDIA GPU and the necessary drivers installed.

  5. WSL 2: For users on Windows, ensure you have WSL 2 enabled. Check Microsoft's official guide for installation instructions.

  6. Sufficient Hardware: Depending on the model and usage, ensure your machine has enough CPU, RAM, and preferably a GPU for better performance.

Step-by-Step Guide

Step 1: Configure Docker Compose

Inside the cloned repository, you should find a docker-compose.yml file. This file defines the services, networks, and volumes for your application. Open it in a text editor and modify it if necessary.

Here’s a basic example of what the docker-compose.yml might look like for the Phi3.5 model:

version: '3.9'

services:

  webui:
    image: ghcr.io/open-webui/open-webui:main
    expose:
     - 8080/tcp
    ports:
     - 8080:8080/tcp
    environment:
      - OLLAMA_BASE_URL=http://ollama:11434
    volumes:
      - open-webui:/app/backend/data
    depends_on:
     - ollama

  ollama:
    image: ollama/ollama
    expose:
     - 11434/tcp
    ports:
     - 11434:11434/tcp
    healthcheck:
      test: ollama --version || exit 1
    command: serve
    volumes:
      - .ollama:/root/.ollama

volumes:
  ollama:
    external: true
  open-webui:

Step 3: Build and Run the Docker Container

In your terminal, navigate to the directory containing the docker-compose.yml file and run:

docker-compose up

This command builds the Docker image and starts the container. If this is the first time you are running it, it may take some time to download the necessary images.

Step 4: Access OpenWebUI

openwebui signup

Once the container is running, you can access the OpenWebUI interface by navigating to http://localhost:8080 in your web browser. This interface allows you to interact with your ChatGPT model seamlessly.

Tip

openwebui signup 
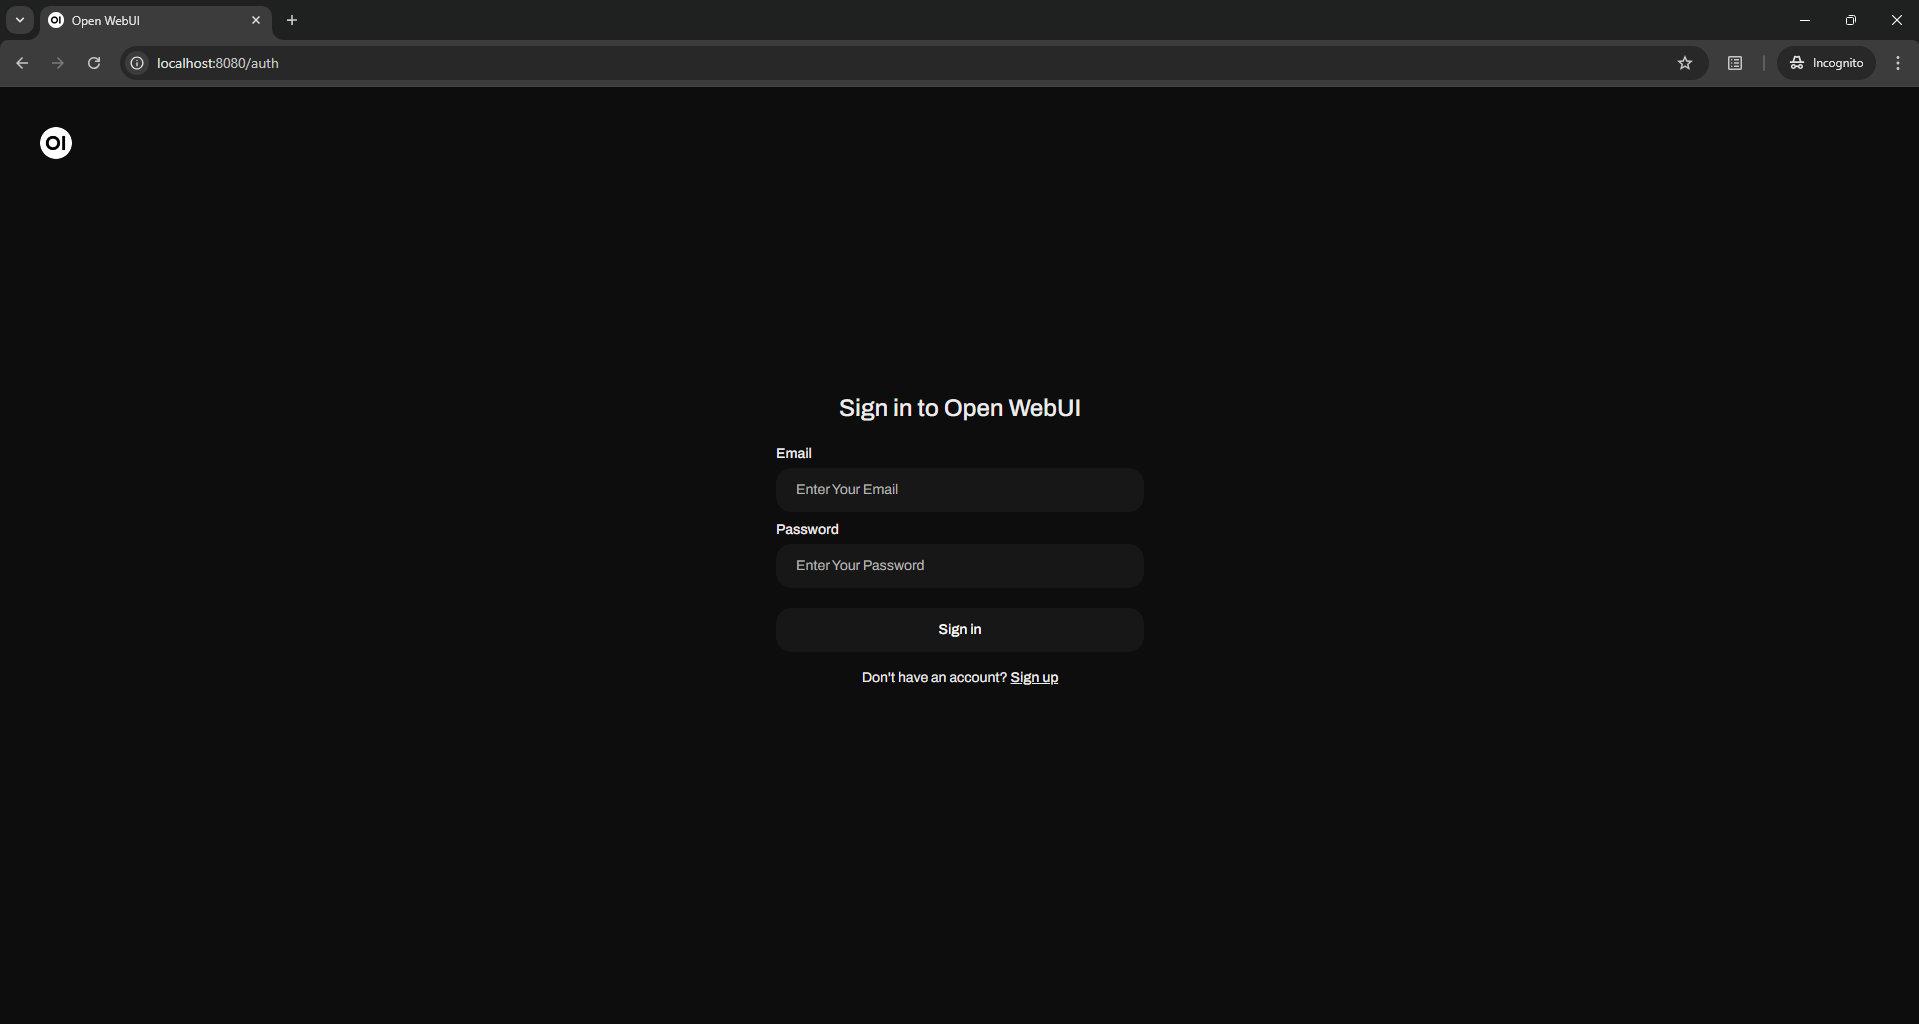
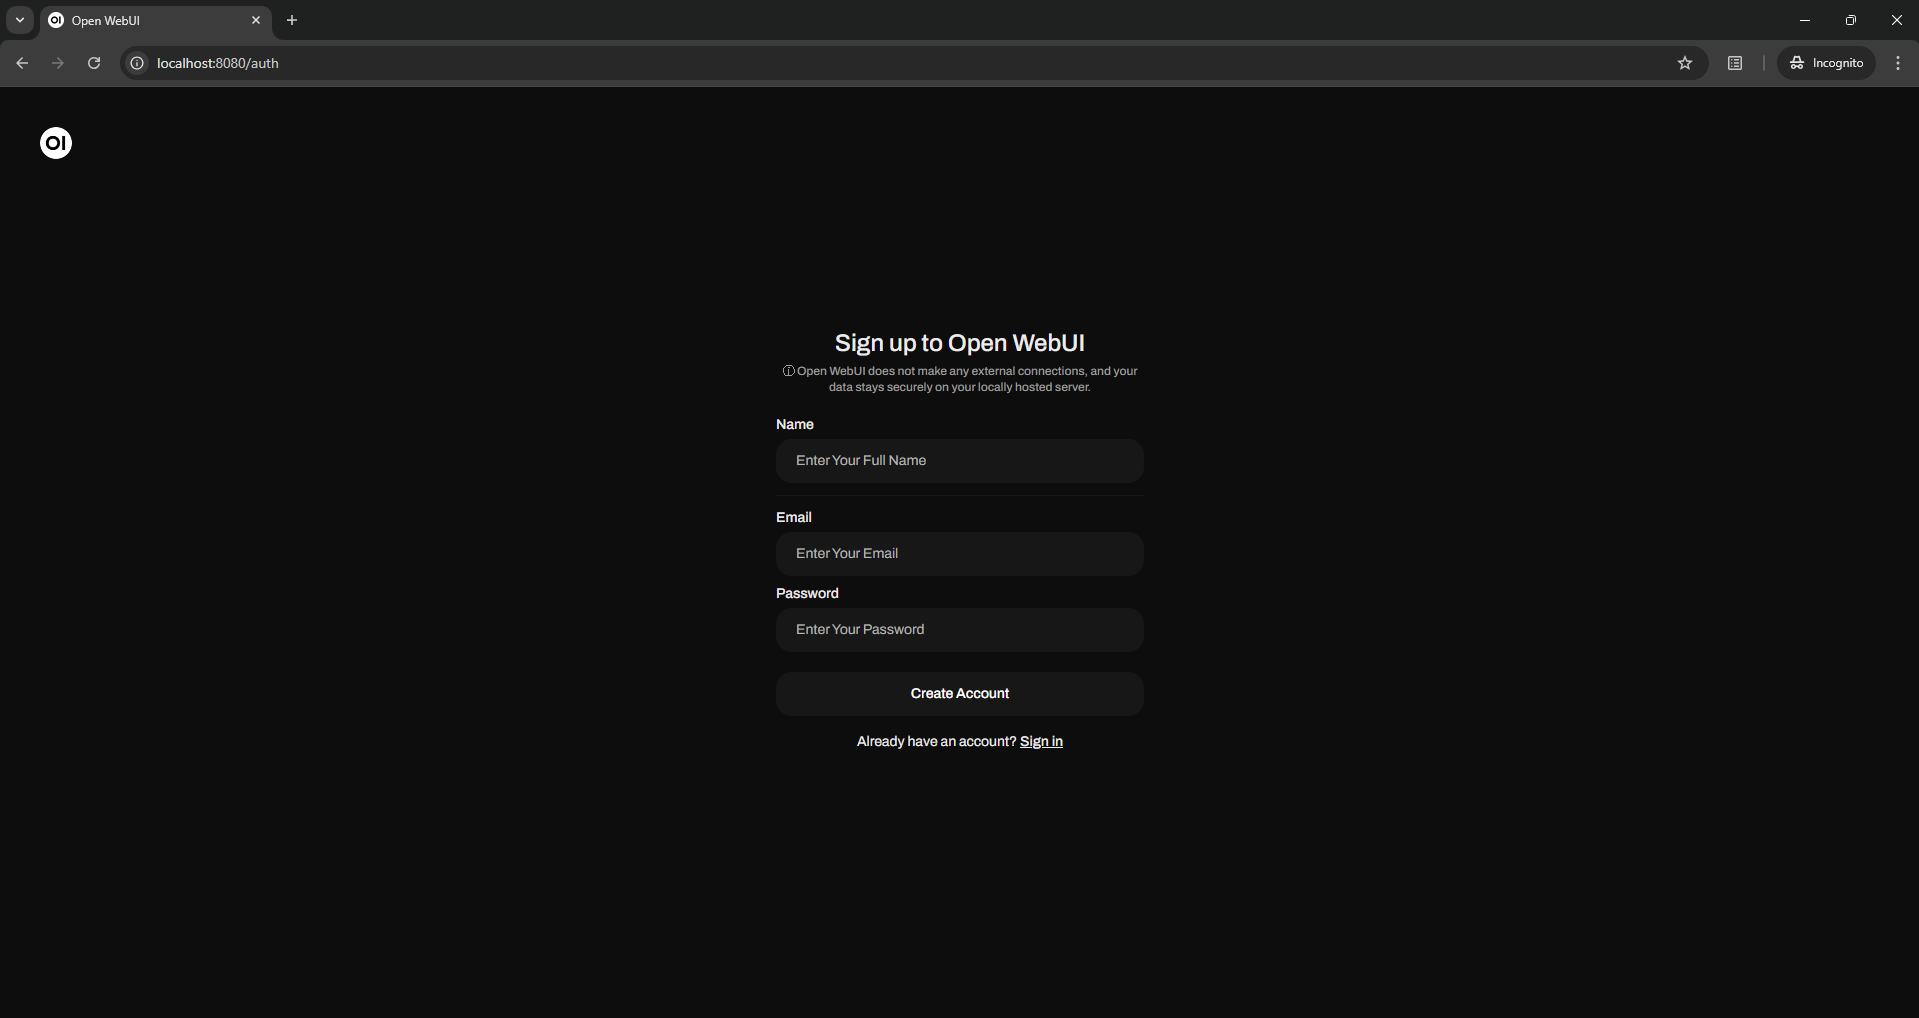
For the first time you need create a local user by clicking up sign up inside Open WebUI , I took 30 minutes to realize it LOL 😂

Step 5: Customizing the Setup

OpenWebUI Demo

  • Model Parameters: You can customize various parameters related to the model’s behavior by adjusting environment variables in the docker-compose.yml file.

  • Persistent Data: Any data you want to persist, such as user interactions or model outputs, can be stored in the open-webui docker volume.

Step 6: Stopping the Docker Container

To stop the container, simply go back to your terminal and press Ctrl+C. If you want to remove the containers, use:

docker-compose down

Bonus Content: How to Setting Up NVIDIA GPU support with windows WSL 2 and Docker on Ubuntu LTS

In this demo video (Bahasa): Menjalankan ChatGPT secara lokal menggunakan docker openwebui dengan model phi3.5

System Specification

  • Processor : 12th Gen Intel(R) Core(TM) i5-12450H
  • CPU cores : 12 @ 2496.008 MHz
  • GPU : NVIDIA GeForce RTX 3050 Laptop GPU, compute capability 8.6
  • AES-NI : ✔ Enabled
  • VM-x/AMD-V : ✔ Enabled
  • RAM : 7.6 GiB
  • Swap : 2.0 GiB
  • Disk : 2.0 TiB
  • Distro : Ubuntu 24.04.1 LTS
  • Kernel : 5.15.153.1-microsoft-standard-WSL2
  • VM Type : WSL version: 2.2.4.0
  • Operating system: Windows 11 - 64 Bit
  • Docker Engine: Docker version 27.3.1, build ce12230 + Docker Compose version v2.29.2-desktop.2

If you have an NVIDIA GPU like me and want to leverage its power to enhance the performance of your ChatGPT model, follow these steps:

Step 1: Install WSL 2 and Ubuntu LTS

  • Enable WSL: Open PowerShell as an administrator and run:
wsl --install
  • Set WSL 2 as Default:
wsl --set-default-version 2
  • Install Ubuntu LTS: You can find it in the Microsoft Store. Once installed, open it to complete the setup.

Step 2: Install NVIDIA Drivers

  • Download and Install NVIDIA Drivers: Ensure you have the latest NVIDIA drivers that support WSL. You can download them from the NVIDIA website.

  • Install CUDA Toolkit: Follow the instructions on the CUDA Toolkit Installation Guide to set it up within your WSL environment.

Step 3: Install Docker in WSL 2

  • Install Docker: Follow these commands within your WSL terminal:
sudo curl -sL https://get.docker.com
  • Start Docker:
sudo service docker start
  • Add your user to the Docker group (to avoid using sudo with Docker):
sudo usermod -aG docker $USER

After running this command, log out and log back into your WSL terminal.

Step 4: Install NVIDIA Container Toolkit

  • Set Up the NVIDIA Docker Toolkit: 1.1 Configure the production repository:

      curl -fsSL https://nvidia.github.io/libnvidia-container/gpgkey | sudo gpg --dearmor -o /usr/share/keyrings/nvidia-container-toolkit-keyring.gpg \
        && curl -s -L https://nvidia.github.io/libnvidia-container/stable/deb/nvidia-container-toolkit.list | \
          sed 's#deb https://#deb [signed-by=/usr/share/keyrings/nvidia-container-toolkit-keyring.gpg] https://#g' | \
          sudo tee /etc/apt/sources.list.d/nvidia-container-toolkit.list
    

    1.2 Update the packages list from the repository and install Install the NVIDIA Container Toolkit packages

      sudo apt-get update
      sudo apt-get install -y nvidia-container-toolkit
    

Follow the instructions from the NVIDIA Docker documentation to install the NVIDIA Container Toolkit, which allows Docker to use your NVIDIA GPU.

  • Configure NVIDIA Docker Toolkit
 sudo nvidia-ctk runtime configure --runtime=docker
 sudo systemctl restart docker
  • Restart your system.

Step 5: Configure Docker to Use the GPU

After installing NVIDIA Docker Toolkit and restart system, Modify your docker-compose.yml file to enable GPU support:

services:

  webui:
    image: ghcr.io/open-webui/open-webui:main
    expose:
     - 8080/tcp
    ports:
     - 8080:8080/tcp
    environment:
      - OLLAMA_BASE_URL=http://ollama:11434
    volumes:
      - open-webui:/app/backend/data
    depends_on:
     - ollama

  ollama:
    image: ollama/ollama
    expose:
     - 11434/tcp
    ports:
     - 11434:11434/tcp
    healthcheck:
      test: ollama --version || exit 1
    command: serve
    volumes:
      - .ollama:/root/.ollama
    #Enable GPU Support
    deploy:
      resources:
        reservations:
          devices:
            - driver: nvidia
              device_ids: ['all']
              capabilities: [gpu]

volumes:
  ollama:
    external: true
  open-webui:

Step 6: Build and Run the Docker Container with GPU Support

Now, you can build and run your container, and it will utilize your NVIDIA GPU 💪

docker-compose up

Step 7: Access OpenWebUI

Access the OpenWebUI as described in the previous steps, and you should now have a performance boost from your NVIDIA GPU.

Benefits of Running ChatGPT Locally

  1. Privacy: Keeping your data local means it’s not shared with third-party servers.
  2. Control: You can modify and configure the model as needed.
  3. Performance: Utilizing a GPU can significantly enhance performance, especially for larger models.

Conclusion

Running ChatGPT locally using Docker OpenWebUI is a straightforward process that provides numerous benefits. With the optional setup for NVIDIA GPU support on WSL 2 and Ubuntu , you can take your local AI capabilities to the next level.

Feel free to dive into the configuration files and experiment with different settings to optimize your local environment 😁


Additional Resources

YABS: Yet-Another-Bench-Script Linux benchmarking tools

yabs.sh

Introduction

Yet-Another-Bench-Script (YABS) is a benchmarking tool primarily designed to assess the performance of Linux servers. It’s a script-based solution that quickly provides insights into CPU, memory, and disk performance. This lightweight and easy-to-use tool is especially popular among system administrators, VPS users, and cloud engineers, offering a quick way to check the raw hardware performance of a server.

Why Do We Need YABS?

  1. Simplified Benchmarking: YABS eliminates the need for complex setup or installation of multiple tools by bundling CPU, memory, disk, and network testing into a single script.
  2. Quick Performance Insights: Whether for a new server or after making configuration changes, you can quickly benchmark key performance metrics in a matter of minutes.
  3. Comparability: Many users in the hosting community use YABS for testing, making it easier to compare performance results against similar configurations or hosting providers.
  4. Ideal for VPS Testing: If you’re evaluating virtual private servers (VPS) or cloud instances, YABS provides an easy way to verify that you're getting the performance you’re paying for.

How to Use Yet-Another-Bench-Script (YABS)

Step 1: Installing YABS

To use YABS, SSH into your Linux server and execute the following command to download and run the script:

curl -sL yabs.sh | bash

Step 2: Running the Benchmark

The script automatically performs tests for:

  • CPU Performance: Using sysbench, YABS tests your server’s CPU speed and efficiency.
  • Disk Performance: It checks your disk's read/write speeds to gauge how fast your storage operates.
  • Network Performance: The script pings well-known servers around the globe to determine network latency and throughput.

Step 3: Write report and Interpreting the Results

curl -sL yabs.sh | bash | tee "yabs-report-$(date +'%Y-%m-%d_%H-%M-%S').txt"

YABS outputs a summary after the test, including:

  • CPU benchmark: Performance results based on how well the CPU can handle multiple threads.
  • Disk I/O: Shows read and write speeds in MB/s for both sequential and random tests.
  • Network throughput: Gives insight into the upload and download speeds between your server and global locations.

Conclusion

YABS is an essential tool for those working with Linux servers, especially when evaluating hardware performance or comparing VPS providers. Its ease of use and quick benchmarking features allow you to verify system capabilities with minimal effort, making it a go-to for system administrators and engineers alike.

Reference

Why You Need a Lightweight Docker Image for Java Apps

This Is Picture

Why You Need a Lightweight Docker Image for Java Apps

In the world of modern software development, Docker has become a key player in containerizing applications for better scalability, portability, and isolation. However, when building Docker images for Java applications, it’s important to focus on lightweight images to improve performance and efficiency. Here’s why you should aim for a minimal, optimized Docker image for your Java apps:

1. Faster Deployment and Boot Time

A lightweight Docker image contains only the essential components needed to run your Java app, reducing the image size. Smaller images mean faster download and upload times, leading to quicker deployment and boot times, which is critical for CI/CD pipelines and rapid iteration.

2. Reduced Resource Consumption

By stripping away unnecessary libraries, system utilities, and bulky JDK versions, lightweight Docker images reduce memory and CPU usage. This is particularly beneficial in microservice architectures, where each service runs in its own container, and you want to minimize overhead to optimize resources.

3. Improved Security

Larger images often come with unused libraries and tools that can introduce security vulnerabilities. Lightweight images have fewer moving parts, reducing the attack surface and improving security by limiting potential vulnerabilities. Choosing a base image like Alpine Linux (a very small, security-focused Linux distribution) helps minimize the risk.

4. Faster Builds and Updates

Building and pushing large Docker images can be slow, especially when they include an entire JDK or OS utilities that aren’t essential. Lightweight images speed up build times and simplify updates since there’s less content to manage or modify in the image layers. This is crucial for teams that rely on frequent updates and patching.

5. Optimized for Cloud and Kubernetes

In cloud environments, where you often pay for resources by the hour or second, efficiency is key. Smaller, lightweight images mean lower storage costs and better utilization of resources, whether you’re using Kubernetes, AWS ECS, or any other orchestration platform.

Tips for Building Lightweight Java Docker Images
  • Use JRE (Java Runtime Environment) instead of JDK unless you need the full development environment.
  • Consider using Alpine-based images (like eclipse-temurin:17-jdk-alpine) for smaller footprints.
  • Use multi-stage builds to separate the build process from the final runtime environment.
  • Leverage tools like Jib (from Google) to optimize image layering without needing Dockerfiles.

Lightweight Dockerfile for Java Apps: Explained

Here is a Dockerfile that uses multi-stage builds to create a lightweight Docker image for a Java application. Let’s walk through it and understand why this approach is efficient and useful for building and running Java apps in containers.

  1. Multi-Stage Build: Why It’s Important The Dockerfile uses multi-stage builds, which are a powerful feature in Docker. The key advantage here is that it allows you to separate the build environment from the final runtime environment.

  2. Stage 1: Building the Java Application

    FROM eclipse-temurin:17-jre-alpine
    

    Explanation

    • Maven Build Environment: The first stage uses the maven:3.9-eclipse-temurin-17-alpine image, which is a lightweight, Alpine-based image with both Maven and the JDK. It’s used to build the Java application.
    • Work Directory: The working directory is set to /build, where the application source code will be copied.
    • Maven Package Command: After copying the source code, it runs the mvn package command to build the project, generating a JAR file in the /target directory.
  3. Stage 2: Creating the Final Lightweight Image

    FROM eclipse-temurin:17-jre-alpine
    

    Explanation

    • Runtime Environment: This second stage uses the eclipse-temurin:17-jre-alpine image, which is much smaller because it only includes the Java Runtime Environment (JRE) required to run the application (not the full JDK).
    • Copying the Built JAR: The JAR file generated in the first stage is copied into this smaller JRE-based image using the COPY --from=build directive, which brings the file from the build stage.
  4. Setting the Entrypoint

    ENTRYPOINT ["java", "-jar", "hello-world.jar"]
    

    Explanation

    • This line defines the command that will run when the container starts, which is executing the built JAR file using the Java runtime.

Conclusion

Building lightweight Docker images for Java apps leads to faster deployments, lower resource consumption, and improved security. It’s a smart choice for modern, cloud-native Java applications, where efficiency, speed, and security are critical factors. Keep your Docker images slim to make the most of your containerized environments!

References:

  1. Docker Multi-Stage Builds: Official documentation explaining the benefits and use of multi-stage builds to optimize image size. Docker Documentation

  2. Alpine Linux: Information on Alpine Linux, a small and security-oriented Linux distribution, which is used as a base for lightweight Docker images. Alpine Linux Website

  3. Eclipse Temurin: Official documentation for Eclipse Temurin, a high-performance Java runtime used in this Dockerfile for both the build and runtime environments. Eclipse Temurin Documentation

  4. Docker Best Practices for Java Applications: Guidelines on how to optimize Docker images for Java applications, including using JRE over JDK and minimizing image layers. Docker Java Best Practices

Infisical: The Open Source Secret Management Solution You Need

This Is Picture

Infisical: The Open Source Secret Management Solution You Need

Managing secrets securely is one of the key challenges in modern software development. Secrets like API keys, database credentials, and tokens are sensitive data that, if exposed, can lead to security breaches, unauthorized access, and system compromises. To address this, secret management tools are critical, and Infisical, an open-source solution, offers an effective way to manage your secrets securely.

In this blog post, we’ll explore what Infisical is, why secret management is crucial, and why Infisical might be the right choice for your secret management needs.

What is Infisical?

Infisical is an open-source secret management platform designed to store, manage, and secure sensitive information (i.e., secrets) used in your applications. As an open-source tool, it allows developers and security professionals to audit, modify, and customize it according to their needs. Infisical integrates seamlessly with modern CI/CD pipelines, infrastructure as code (IaC), and DevOps workflows.

With Infisical, developers can securely manage secrets such as:

  • API keys
  • Database credentials
  • OAuth tokens
  • SSH keys

Why Infisical?

Infisical helps developers achieve secure centralized secret management and provides all the tools to easily manage secrets in various environments and infrastructure components. In particular, here are some of the most common points that developers mention after adopting Infisical:

  • Streamlined local development processes (switching .env files to Infisical CLI and removing secrets from developer machines).
  • Best-in-class developer experience with an easy-to-use Web Dashboard.
  • Simple secret management inside CI/CD pipelines and staging environments.
  • Secure and compliant secret management practices in production environments.
  • Facilitated workflows around secret change management, access requests, temporary access provisioning, and more.
  • Improved security posture thanks to secret scanning, granular access control policies, automated secret rotation, and dynamic secrets capabilities.

Why Do We Need Secret Management?

Secrets are integral to the functioning of most applications. These credentials allow communication between services, databases, and APIs. Improper handling of secrets, such as storing them in plain text or hardcoding them in the application’s codebase, exposes them to risks like:

  • Unauthorized Access: If secrets are stored insecurely, bad actors can gain access to critical systems or sensitive data.
  • Security Breaches: Exposed secrets can lead to attacks, including data breaches, where sensitive information is stolen or leaked.
  • Compliance Violations: Many regulations require companies to protect sensitive data. Failing to manage secrets properly can result in legal consequences and penalties.

For these reasons, it is essential to use a secret management tool that not only stores secrets securely but also ensures that they are used safely within your workflows.

Why Choose Infisical for Secret Management?

  1. Open Source and Transparent Infisical’s open-source nature allows you to inspect the source code, audit the system for vulnerabilities, and even customize it to suit your organization’s specific needs. This level of transparency builds trust in the system, as users can be confident that no hidden vulnerabilities exist.

  2. End-to-End Encryption Infisical encrypts secrets both at rest and in transit, ensuring that even if someone gains access to the server or data, the secrets remain unreadable without the proper decryption keys.

  3. Seamless Integration Infisical integrates smoothly with popular tools like Docker, Kubernetes, AWS, GitHub Actions, and more. This means you can inject secrets directly into your containers or CI/CD pipelines without risking exposure.

  4. Role-Based Access Control (RBAC) Infisical provides granular access control, ensuring that only authorized personnel can access certain secrets. This reduces the risk of insider threats and ensures that sensitive data is handled on a need-to-know basis.

  5. Version Control and Auditing Infisical logs all changes to secrets, allowing teams to track who accessed or modified them and when. This is essential for maintaining security, debugging issues, and complying with regulatory requirements.

  6. Collaboration Made Easy Teams can use Infisical to collaborate securely on shared secrets. The platform ensures that secrets are always up to date across environments, eliminating the common issue of outdated credentials or manual updates.

How To Use in Local Development Environment

In this demo we will use infisical CLI for retrieve secret from Infisical Cloud or Self-host

  1. Cloud or Self-host
  2. Create Project + Add New Project This Is Picture
  3. Add Project Secret Project Name > + Add Secret in here you can add secret individually This Is Picture This Is Picture
  4. Or upload .env file Development > Explore > Drag and Drop a .env, .json, or .yml This Is Picture
  5. Create Service Token: Access Control > Service Token This Is Picture This Is Picture
  6. Install Infisical CLI, Guide Here
  7. Login using web auth (default)
       #Login infisical Self-host using web-auth
       infisical login
       ========================================================================
        Self Hosting
       Domain: https://INFISICAL_URL
    
       To complete your login, open this address in your browser: https://INFISICAL_URL/login?callback_port=34715 
    
       Once login is completed via browser, the CLI should be authenticated automatically.
       However, if browser fails to communicate with the CLI, please paste the token from the browser below.
    
       Token: Browser login successful
       >>>> Welcome to Infisical! You are now logged in as EMAIL_ACCOUNT <<<< 
    
       Quick links
       - Learn to inject secrets into your application at https://infisical.com/docs/cli/usage
       - Stuck? Join our slack for quick support https://infisical.com/slack
    
  8. Infisical project init
       infisical init
       ========================================================================
        YOUR_ORG
        infisical-demo
       cat .infisical.json
       {
          "workspaceId": "xxxxxxx-xxxxx-xxxx-xxxx-xxxxxxxxxx",
          "defaultEnvironment": "dev",
          "gitBranchToEnvironmentMapping": null
       }                                             
    
  9. Run your apps with infisical secret using infisical run -- your-run-apps-script
       infisical run --env=dev --path="/" -- docker run hello-world
       ========================================================================
       4:11PM INF Injecting 1 Infisical secrets into your application process      
    
  10. Generate .env file using infisical export
       infisical export --env=dev > .env
       ========================================================================
       #Show .env File content
       ls -alh
       total 24K
       drwxr-xr-x  2 dash15 dash15 4.0K Sep 19 16:18 .
       drwxrwxrwt 39 root   root    12K Sep 19 16:09 ..
       -rw-r--r--  1 dash15 dash15   29 Sep 19 16:18 .env
       -rw-------  1 dash15 dash15  134 Sep 19 16:09 .infisical.json
    
       cat .env
       APP_KEY='1234567890-app-key'
    

How To Use in Gitlab CI/CD Environment

In this demo we will use Infisical with Gitlab CI/CD Pipeline

  1. Create Machine Identity Organization Settings > Machine Identities > + Create identity
  2. Choose universal-auth method for generating INFISICAL_TOKEN Machine Identity
  3. Setup Gitlab CI/CD Variables

    Gitlab CI/CD Variables List

    • INFISICAL_URL = YOUR_INFISICAL_URL
    • INFISICAL_PROJECT_ID = YOUR_INFISICAL_PROJECT_ID
    • INFISICAL_ENV_PATH = /PATH/TO/PROJECT-GROUP (Leave empty use default path "/")
    • INFISICAL_ENVIRONMENT = Dev | Staging | Prod
    • INFISICAL_CLIENT_ID = Machine Identity Client ID
    • INFISICAL_CLIENT_SECRET = Machine Identity Secret Token
    • GITLAB_INFISICAL_CLI_VERSION = Infisical CLI Version (Leave empty use default 0.31.0)
  4. Setup Gitlab Pipeline, create .gitlab-ci.yml file

This Is Picture

Conclusion

Managing secrets securely is not just a best practice—it’s a necessity. Infisical, as an open-source secret management solution, offers a blend of security, transparency, and ease of use, making it a strong contender for anyone looking to secure their application secrets. By implementing Infisical, you can reduce the risk of security breaches, unauthorized access, and compliance violations, all while enabling your team to collaborate effectively and securely on sensitive data.

Reference

UFW: Accidentally locked out SSH Port (22)

Introduction

let me in

So, you've just launched your first AWS EC2 instance. Awesome! But wait, what’s that? Your instance is up, but you can’t seem to connect? You might have stumbled into a common issue that many newbies face: Firewall Configuration ✨

AWS offers security groups by default, but sometimes, you'll want more control using tools like UFW (Uncomplicated Firewall), This article will guide you through solving firewall problems using UFW on your EC2 instance and avoid locking yourself out.

Understanding UFW and AWS Security Groups

What is UFW?

UFW stands for "Uncomplicated Firewall." As the name suggests, it’s designed to simplify the process of managing iptables rules, which can be quite complex. UFW helps you quickly allow or block traffic on specific ports with simple commands.

What are AWS Security Groups?

AWS Security Groups are virtual firewalls provided by AWS to control traffic to and from your EC2 instances. They are essential for managing inbound and outbound rules at a higher, network-based level.

Why Configuring UFW on EC2 Causes Issues?

Beginners often face problems because they forget that AWS Security Groups and UFW can sometimes overlap in functionality. If you configure UFW without considering your security group rules, you might block traffic that was previously allowed, leading to issues like getting locked out of your instance.

Tip

I do recommend only use AWS Security Group and leave UFW configuration open all port

If you want to control which port opened, just use AWS Security Group from AWS Console or AWS CLI 😁

Resolution

You could use the following Simplest way (user-data) to turn off the ufw.

  1. Access your AWS EC2 Instance
  2. Stop the instance first
  3. In Instance Settings, View/Change User Data
  4. Copy and Set the below user data as plain text and save

    Content-Type: multipart/mixed; boundary="//"
    MIME-Version: 1.0
    
    --//
    Content-Type: text/cloud-config; charset="us-ascii"
    MIME-Version: 1.0
    Content-Transfer-Encoding: 7bit
    Content-Disposition: attachment; filename="cloud-config.txt"
    
    #cloud-config
    cloud_final_modules:
    - [scripts-user, once]
    
    --//
    Content-Type: text/x-shellscript; charset="us-ascii"
    MIME-Version: 1.0
    Content-Transfer-Encoding: 7bit
    Content-Disposition: attachment; filename="userdata.txt"
    
    #!/bin/bash
    sudo ufw disable
    --//
    
  5. Start AWS EC2 Instance

  6. Remove UFW Rules and Disable UFW by default

    sudo ufw disable
    
  7. Remove User Data from EC2 Instance (optional)

Testing Your Configuration

Once you've set everything up, you can test your firewall by trying to access your EC2 instance from different IP addresses or running network diagnostic tools.

Conclusion

Configuring UFW for your AWS EC2 instance can be tricky for beginners, but with careful planning and understanding of how UFW and AWS Security Groups interact, you can create a secure environment for your applications. Don’t rush the process — take your time to set up, test, and refine your firewall settings.

Reference

Automating Docker Container Updates with Watchtower, AWS ECR, and Mattermost Notifications

Published on 2024-09-07

This Is Picture

As DevOps keeps growing, automation is becoming more important than ever for managing modern infrastructure. In this post, I’ll show you an easy way to automate Docker container updates using Watchtower. On top of that, we’ll hook it up with AWS ECR Credentials Helper for hassle-free authentication and Mattermost for sending real-time notifications.

What is Watchtower?

Watchtower is a powerful tool that simplifies the process of keeping your Docker containers updated. It automatically checks for new images, pulls them from Docker Hub or private registries like AWS ECR, and redeploys the updated containers. The entire process is handled with minimal intervention, ensuring that your containers are always up-to-date.

Read More: Medium: Automating Docker Container Updates with Watchtower, AWS ECR, and Mattermost Notifications

Tulisan Pertama Disini

Published on 2024-09-01

Quote

Ilmu adalah buruan dan tulisan adalah ikatannya Ikatlah buruanmu dengan tali yang kuat, Termasuk kebodohan kalau engkau memburu kijang Setelah itu kamu tinggalkan terlepas begitu saja.
(Diwan Asy-Syafi’i)

Mungkin hal itu yang menjadikan motivasi saya dalam menulis sebuah catatan disini, manusia memang tempatnya kesalahan salah satunya adalah sifat lupa, maka dari itu saya menuliskan kembali ilmu yang saya dapatkan dan semoga tulisan saya disini dapat membantu rekan-rekan semua karena saya yakin dengan berbagi ilmu yang kita miliki merupakan salah satu cara agar kita dapat berguna bagi orang lain karena sebaik baiknya manusia adalah yang bermanfaat untuk orang lain.

How to Configure Grafana Alloy with Self-Hosted Prometheus and Loki Server

Published on 2024-08-21

This Is Picture

Quick Introduction

Grafana Loki

Grafnana Loki a powerful and scalable log aggregation system, lacks built-in authentication. To protect your log data, it’s essential to implement a robust authentication mechanism. This post guides you through setting up basic authentication for Loki behind an Nginx reverse proxy.

Promtail

Promtail is a log collection agent designed to efficiently gather log data from various sources and send it to a Grafana Loki instance for storage and analysis. It’s a crucial component of the Grafana Loki stack, working alongside Loki and Grafana to create a comprehensive log management solution.

Monitoring and logging are crucial aspects of maintaining the health and performance of your applications. Grafana Loki, a powerful tool for log aggregation and visualization, simplifies this task. By setting it up behind an Nginx reverse proxy with basic authentication, you can secure your logging infrastructure efficiently. This guide will walk you through the entire process step by step.

Read More: Medium: How to Configure Grafana Alloy with Self-Hosted Prometheus and Loki Server