Enhance Resource Security with Pritunl VPN Server
Ensuring secure remote access is essential for data privacy and efficient collaboration across dispersed teams. One of the most reliable solutions for securing such communication is Pritunl VPN Server—an open-source, scalable, and highly secure VPN solution that allows users to safely access internal networks from anywhere.
In this guide, you’ll learn how to install and configure Pritunl VPN Server for corporate use, making sure your team enjoys safe, encrypted communication wherever they are.
Pritunl features
Pritunl is an open-source, enterprise-level VPN server that provides a highly secure and scalable way to manage virtual private network (VPN) connections for businesses and organizations.
- Open-Source and Free
- Highly Scalable
- Web-Based Management Interface
- Multi-Cloud and Cross-Platform Support
- Two-Factor Authentication (2FA)
- And many more, Source: pritunl.com
Pritunl is a powerful and flexible VPN solution that combines ease of use, scalability, and enterprise-grade security features.
Prerequisites
Before you start, ensure you have the following:
- A server running a fresh installation of Ubuntu 22.04 or higher.
- 16 GB SSD, 1 vCPU 1 Gb RAM, for small deployment ~ 50 user.
- Root or sudo access to the server.
- A public IP address for the VPN server.
- Domain name (optional but recommended for easier access).
- SSH access to the server.
Step 1: Add Pritunl Repository (Ubuntu 22.04)
Open your server terminal, copy and paste command below
sudo tee /etc/apt/sources.list.d/mongodb-org.list << EOF
deb [ signed-by=/usr/share/keyrings/mongodb-server-7.0.gpg ] https://repo.mongodb.org/apt/ubuntu jammy/mongodb-org/7.0 multiverse
EOF

sudo tee /etc/apt/sources.list.d/openvpn.list << EOF
deb [ signed-by=/usr/share/keyrings/openvpn-repo.gpg ] https://build.openvpn.net/debian/openvpn/stable jammy main
EOF

sudo tee /etc/apt/sources.list.d/pritunl.list << EOF
deb [ signed-by=/usr/share/keyrings/pritunl.gpg ] https://repo.pritunl.com/stable/apt jammy main
EOF

sudo apt --assume-yes install gnupg

curl -fsSL https://www.mongodb.org/static/pgp/server-7.0.asc | sudo gpg -o /usr/share/keyrings/mongodb-server-7.0.gpg --dearmor --yes
curl -fsSL https://swupdate.openvpn.net/repos/repo-public.gpg | sudo gpg -o /usr/share/keyrings/openvpn-repo.gpg --dearmor --yes
curl -fsSL https://raw.githubusercontent.com/pritunl/pgp/master/pritunl_repo_pub.asc | sudo gpg -o /usr/share/keyrings/pritunl.gpg --dearmor --yes
sudo apt update
Step 2: Install pritunl VPN Server
Open your server terminal, copy and paste command below
sudo apt --assume-yes install pritunl openvpn mongodb-org wireguard wireguard-tools

sudo ufw disable

sudo systemctl start pritunl mongod
sudo systemctl enable pritunl mongod
Tip
Please add repository based on your current operating system here https://docs.pritunl.com/docs/repo
Step 3: Pointing IP Public pritunl VPN Server to your DNS Record
This is optional but highly recommended for secure and easier VPN Server Management, I believe you can configure DNS Record, but if you don't know how to do it please check this tutorial namecheap.com: How to set up DNS records for your domain in a Cloudflare account
Step 4: Enable SSL in Web Access
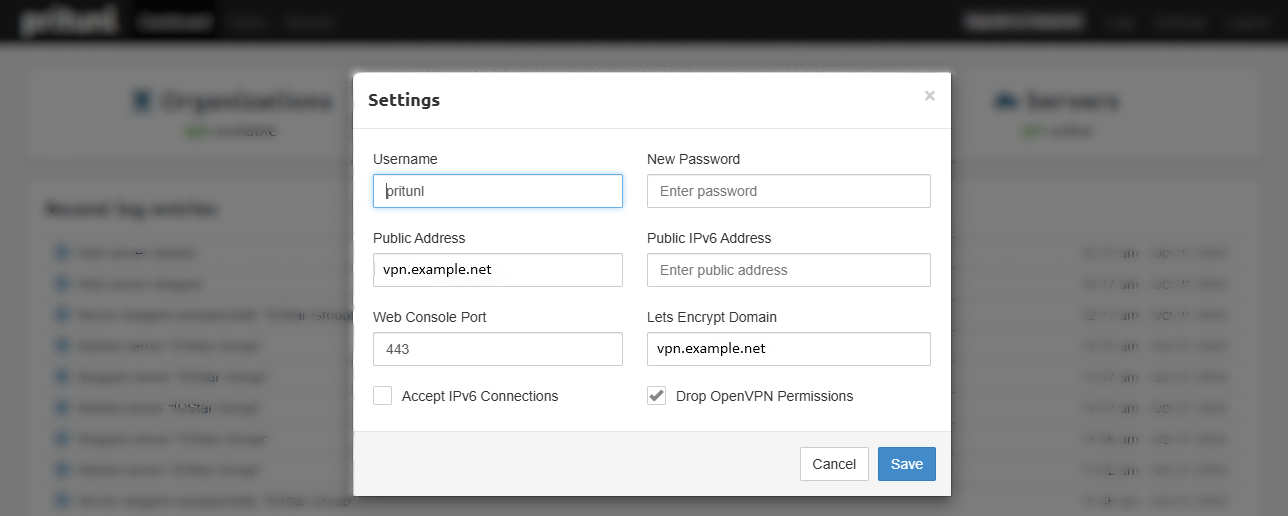
After pointing DNS Record to your VPN Server, I recommend to config SSL Cert using Let's Encrypt
- Login to your pritunl admin.
- Click Settings.
- Enter Public Address using Hostname / Server Public IP.
- Enter Lets Encrypt Domain.
Tip
How to renew pritunl Let's Encrypt certificate
Step 5: Config pritunl VPN Server
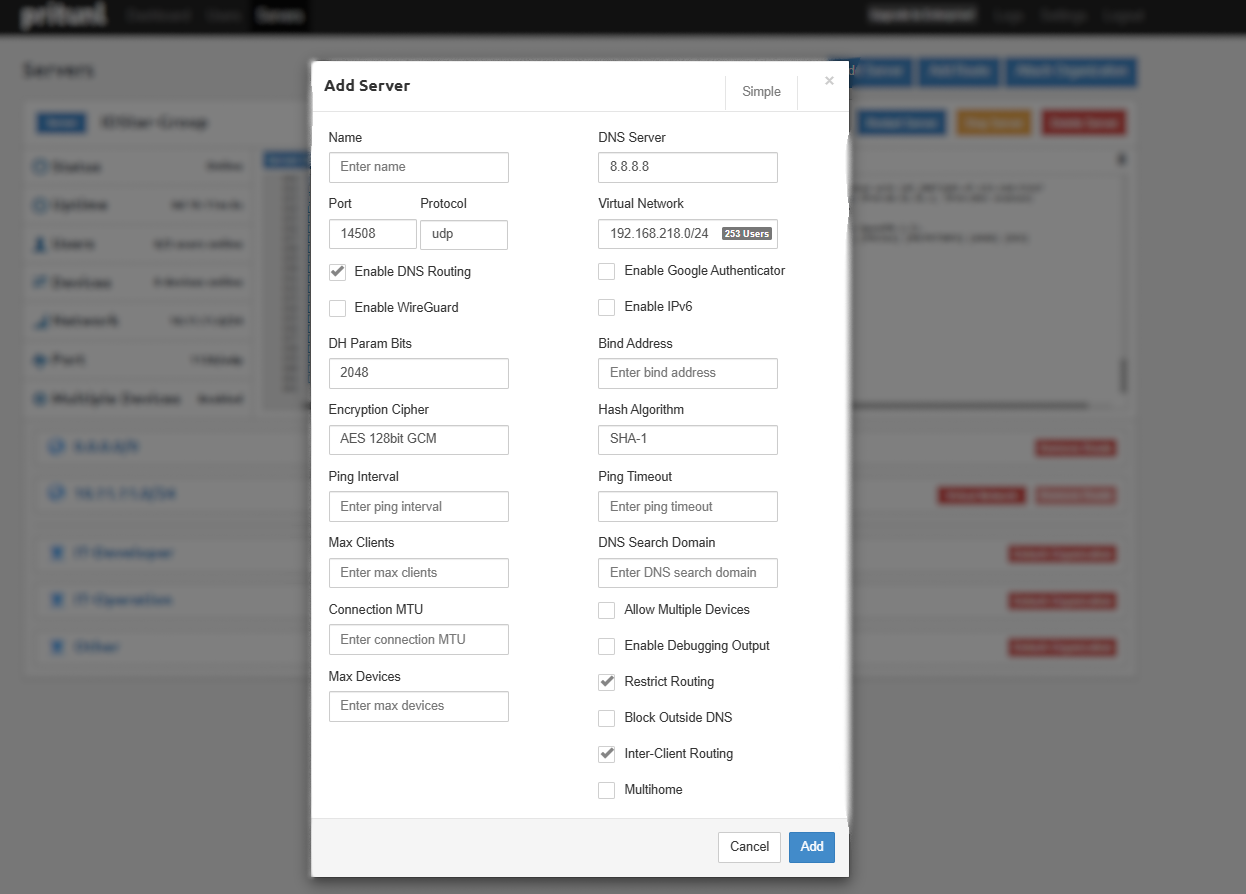
- Login to your pritunl admin.
- Click Servers > Add Server.
- Click Advanced for more details.
- Enable DNS Routing (Recommended).
- Choose UDP and Port Number.
- Customize other config.
- Click Add.
- Start Server.
Info
⚠️ Don't forget to open the chosen UDP/TCP port in your firewall, or users won’t be able to connect! 😹
Step 6: Add User and Organization
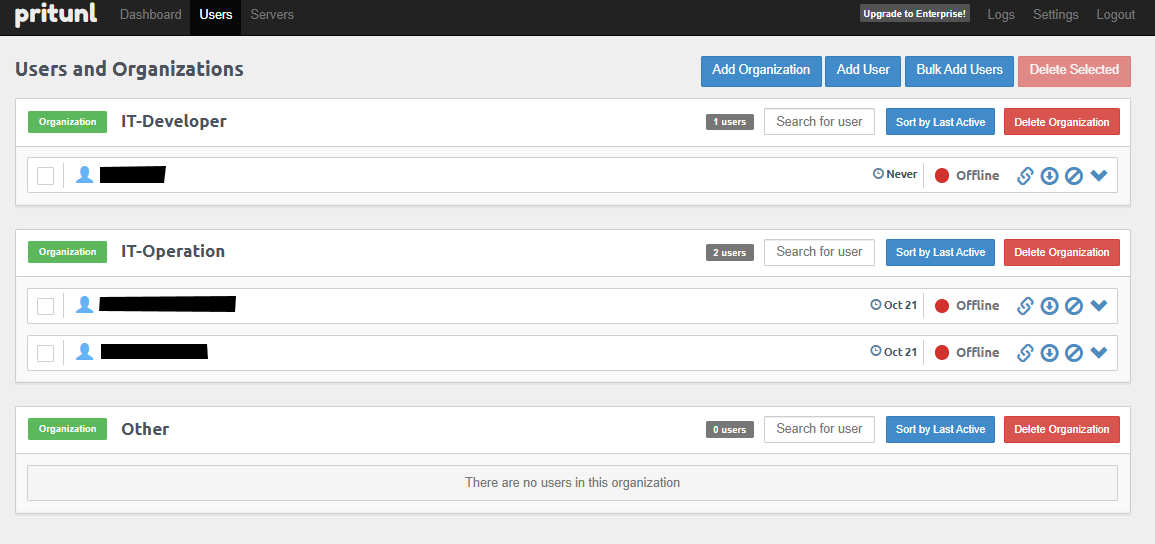
To add users and manage access:
- Log in to the Pritunl admin panel.
- Go to Users > Add Organization.
- Add a new user and assign them to the organization.
Step 7: Download VPN Client and Import Profiles
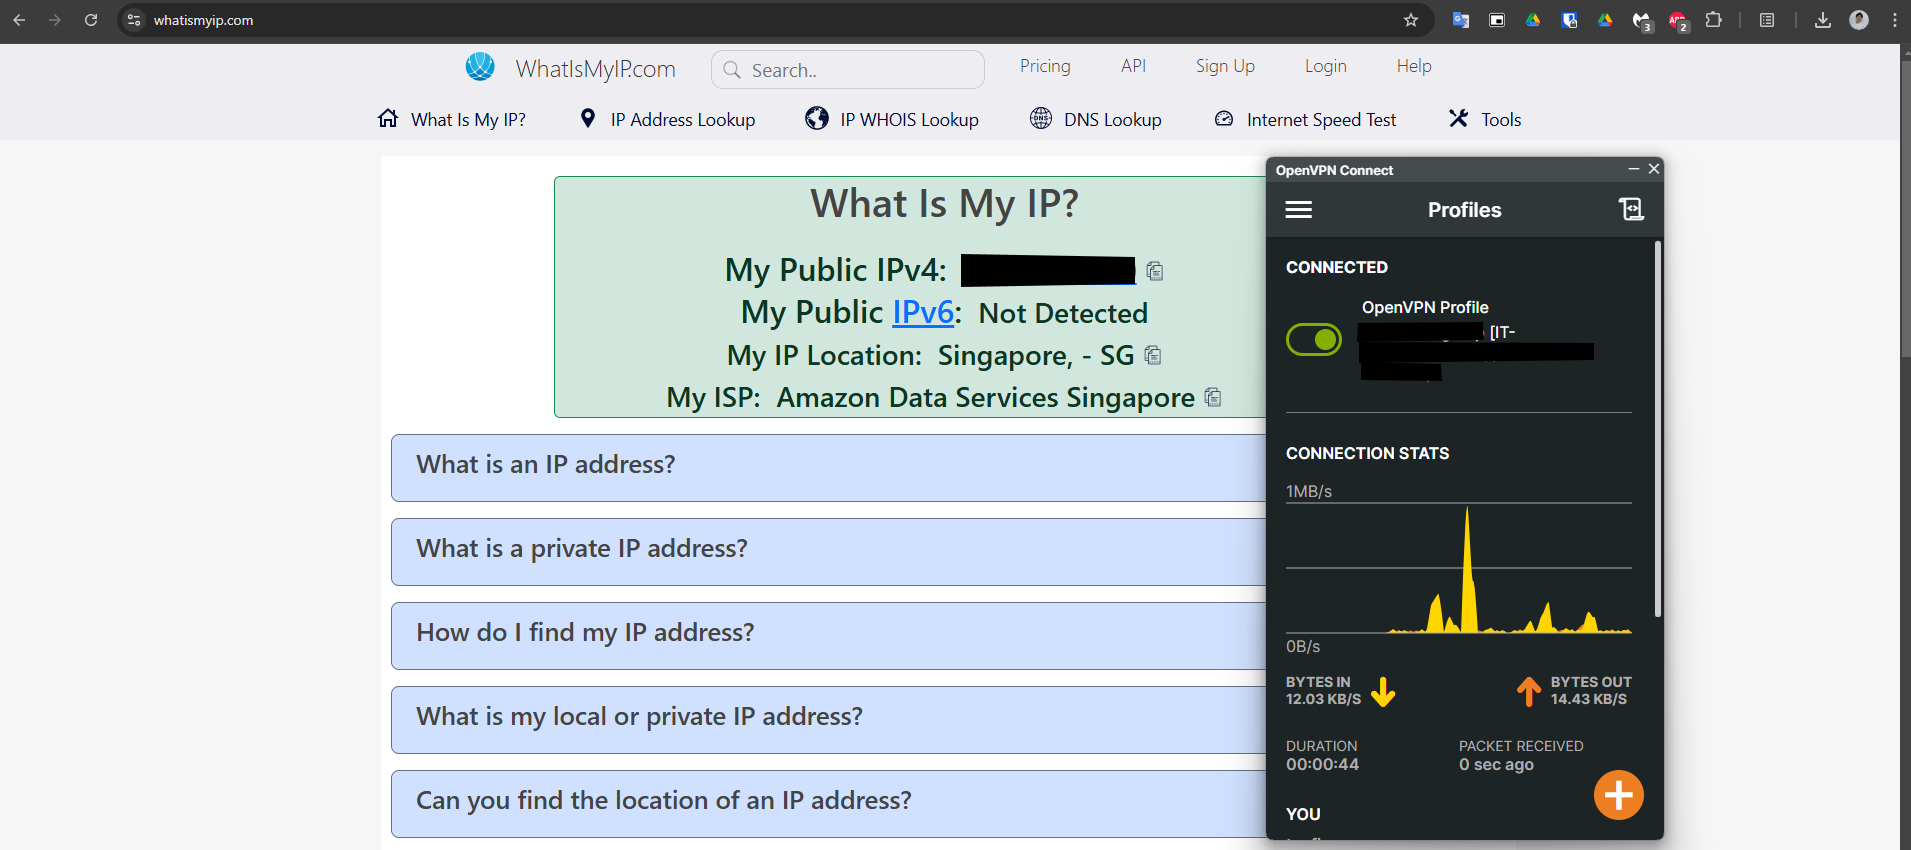
Finally you can start connect to your VPN Server and use secure connection for accessing your resource. To connect to your VPN server:
- Log in to the Pritunl admin panel.
- Navigate to Users > Select the user > Download Profile.
- Extract the .tar file.
- Import the profile into your VPN client app.
- Enter the username and password (User PIN).
- Connect to the VPN server.
- Verify your connection by checking your public IP WhatIsMyIP
Tip
You can use the OpenVPN Connect client Apps, or download the official Pritunl Client
Conclusion
By following this guide, you have successfully installed and configured the Pritunl VPN Server for corporate use. With its flexibility, Pritunl allows for easy scaling, making it perfect for businesses prioritizing secure remote access. Its built-in SSL configuration and user management features offer robust protection for sensitive data.
Explore more of Pritunl’s advanced features, such as Multi-Factor Authentication (MFA), advanced firewall rules, or split tunneling for optimized traffic.for further customizations such as multi-factor authentication (MFA), advanced firewall rules, or split tunneling for optimized network traffic.